Structural Flange Design
Overview
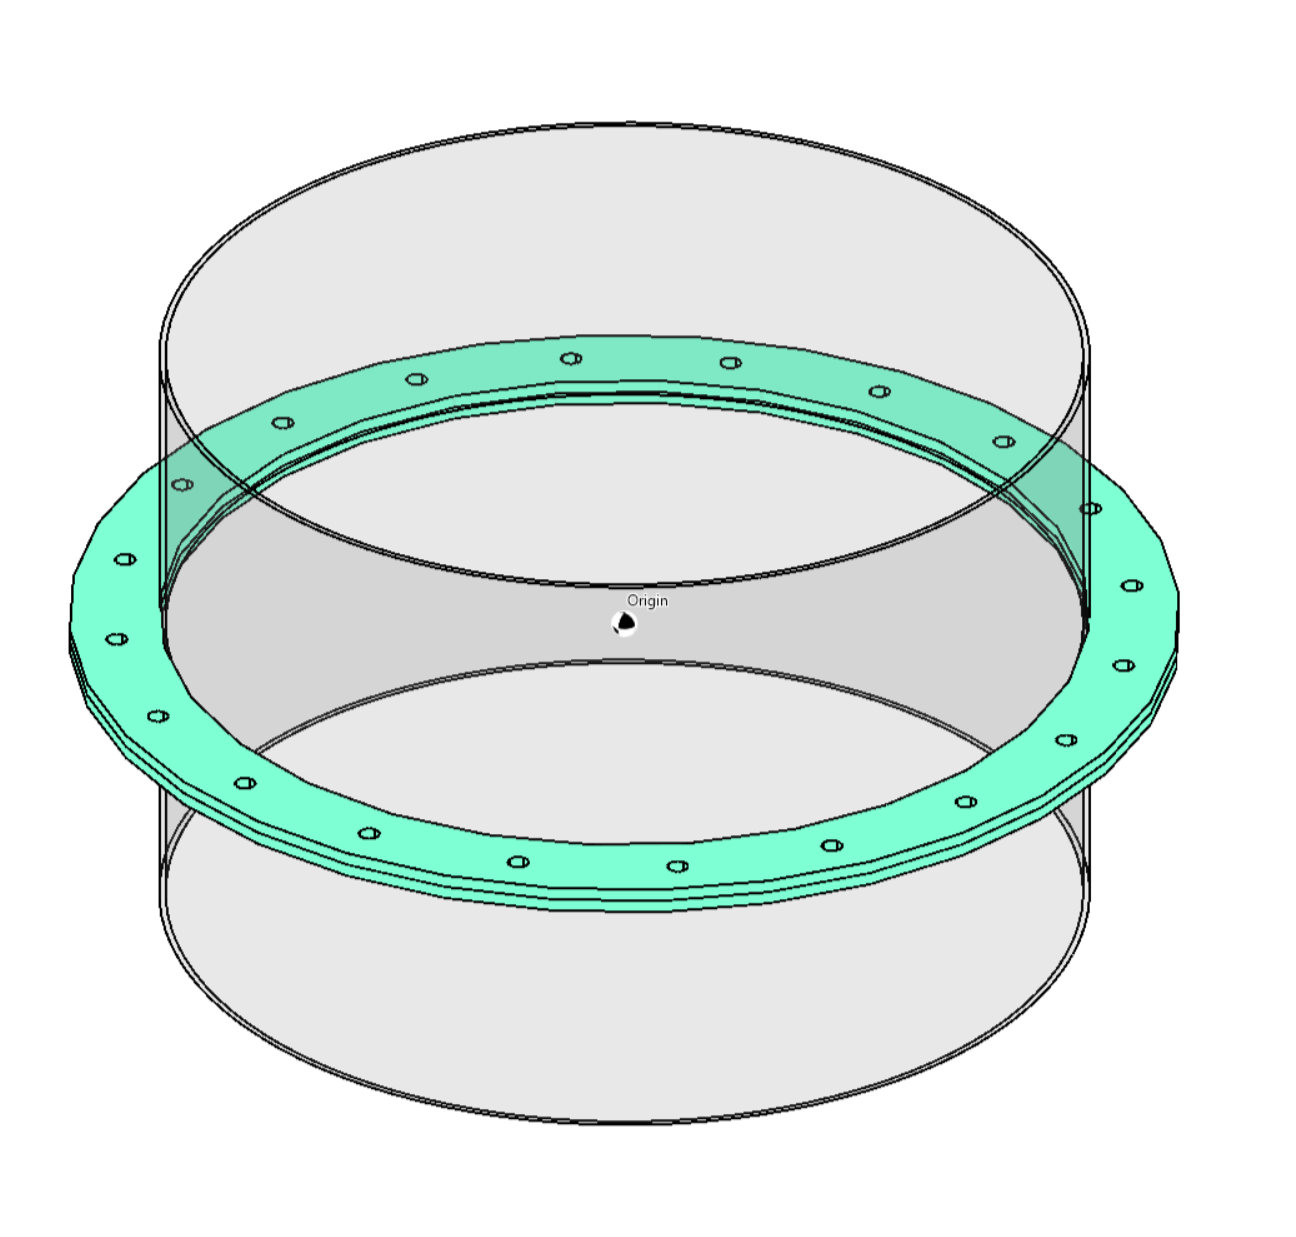
This article outlines the design methodology used to analyze structural plate flanges. When a steel stack is fabricated in sections to facilitate transportation, these sections are often joined using bolted flanges to minimize field welding.
While there are many guidelines for designing pressure-retaining flanges—such as those found in the ASME Boiler and Pressure Vessel Code Section VIII, Appendix 2—these methods are complex and primarily focused on achieving proper gasket seating. In contrast, structural flanges, commonly referred to as plate flanges, are simpler and more frequently used in non-pressure structural applications.
If a gasket is used in a structural flange, it is typically a self-energizing type that does not require the seating stress demanded by pressure flanges.
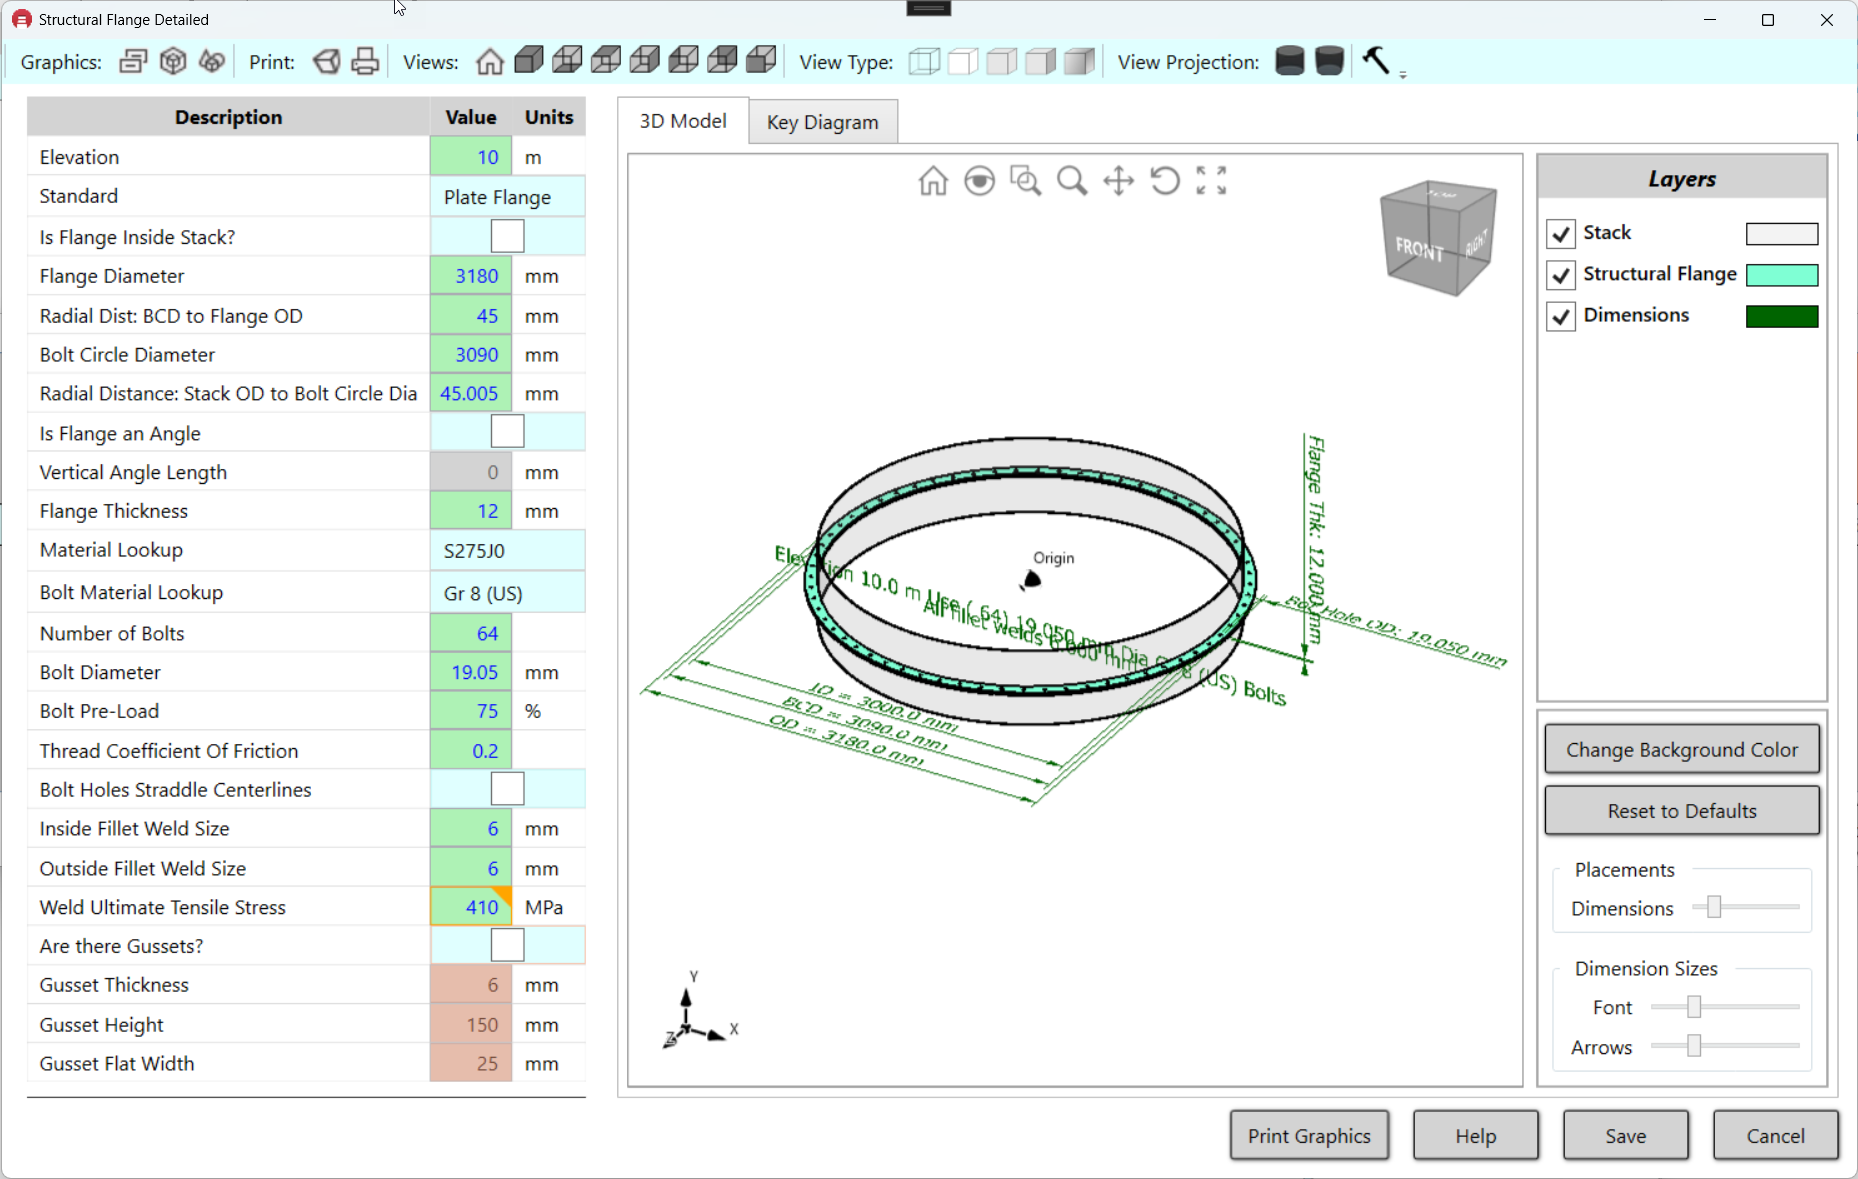
The MecaStack software includes an option for designing these structural flanges. This article details the design approach for plate flange analysis without gussets.
(Click here to view an article for a flange designed WITH gussets).
Example Problem
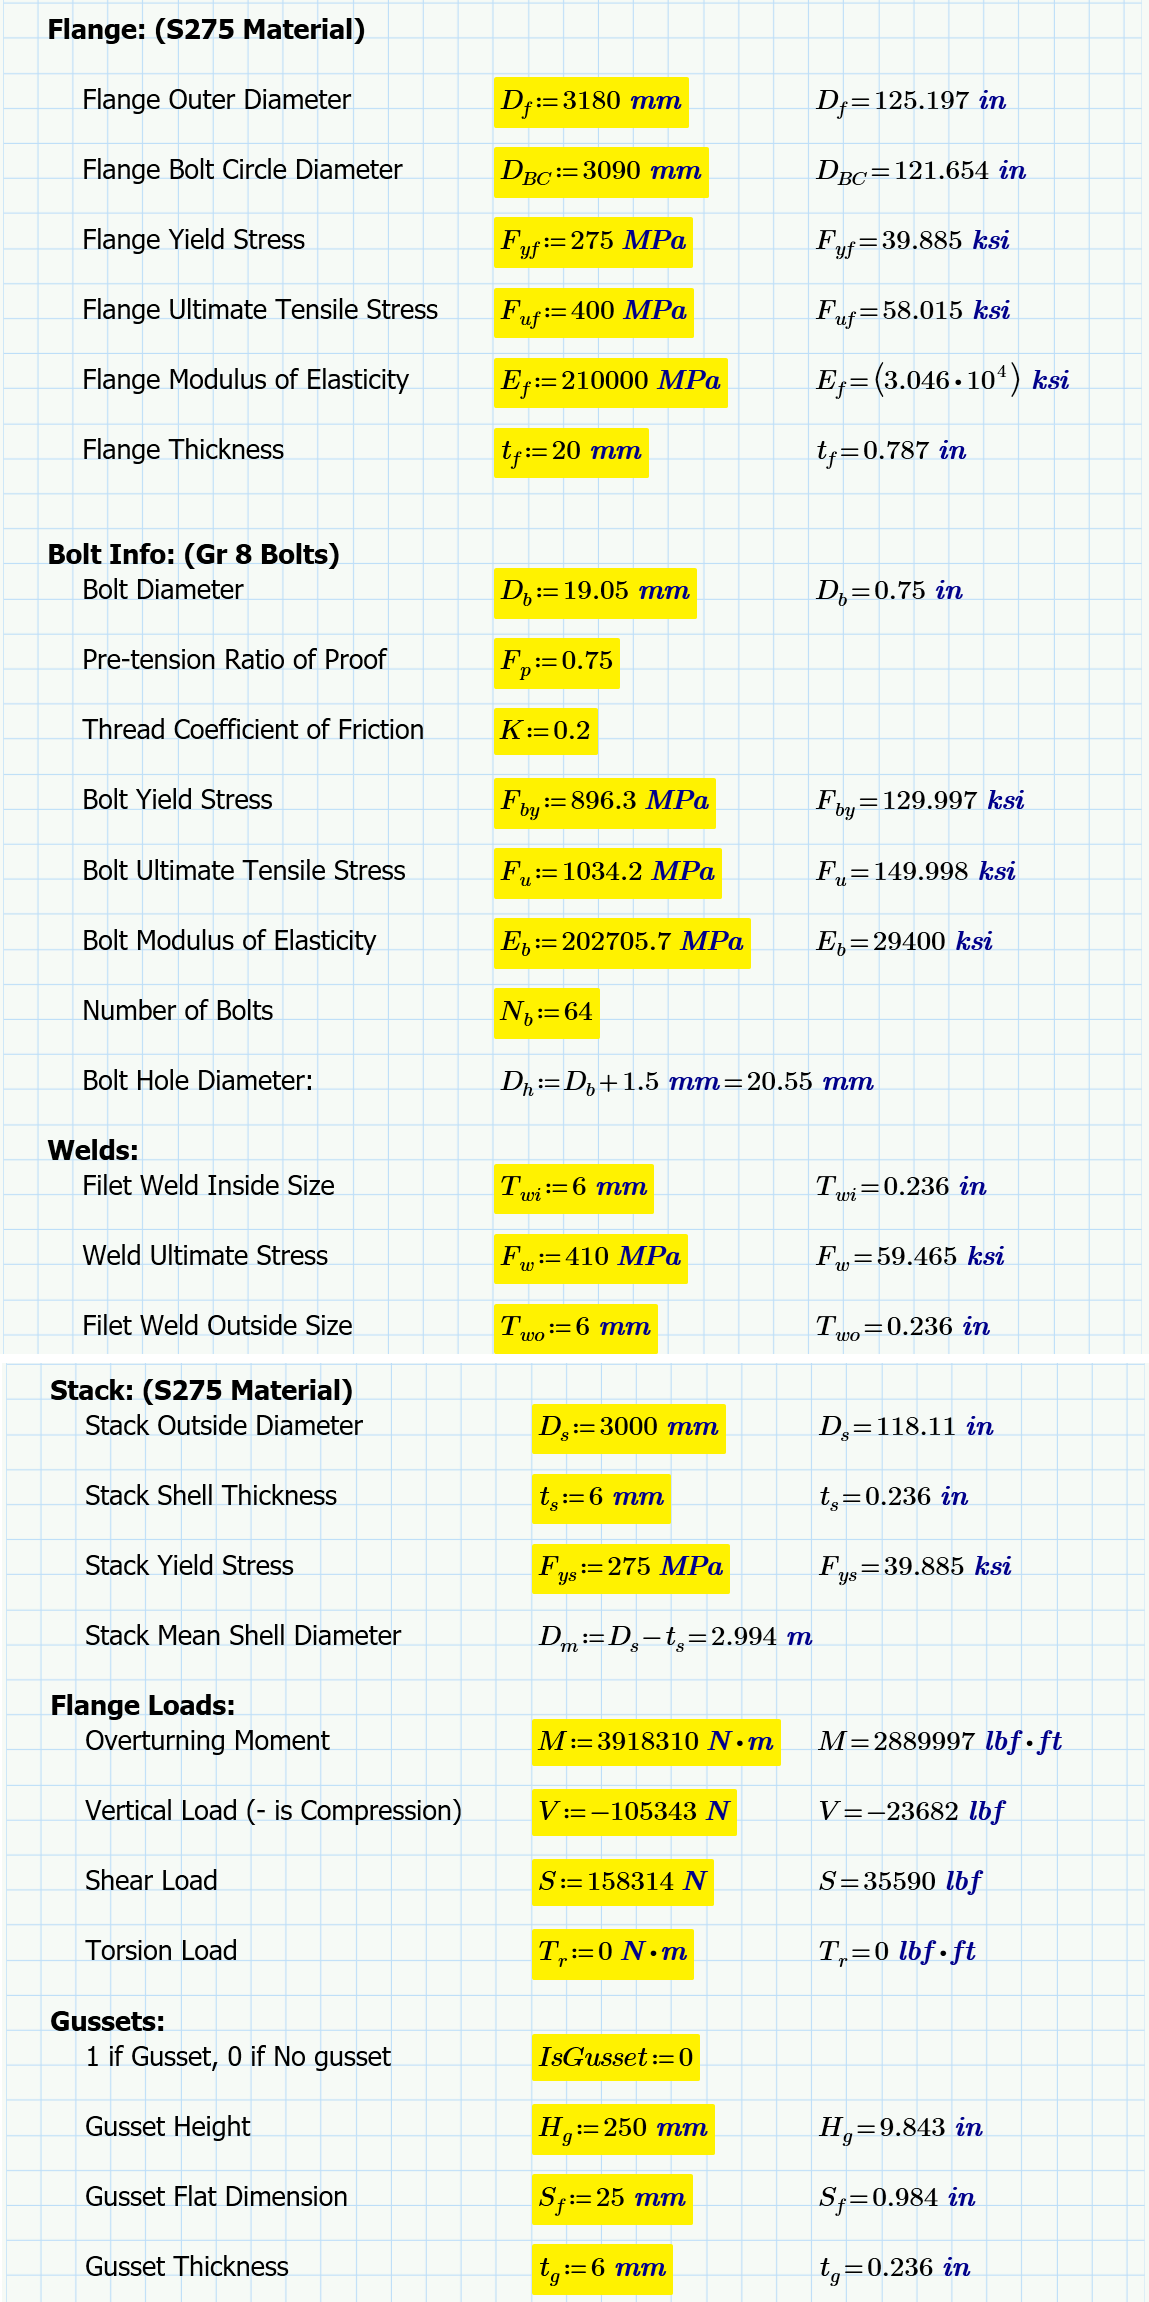
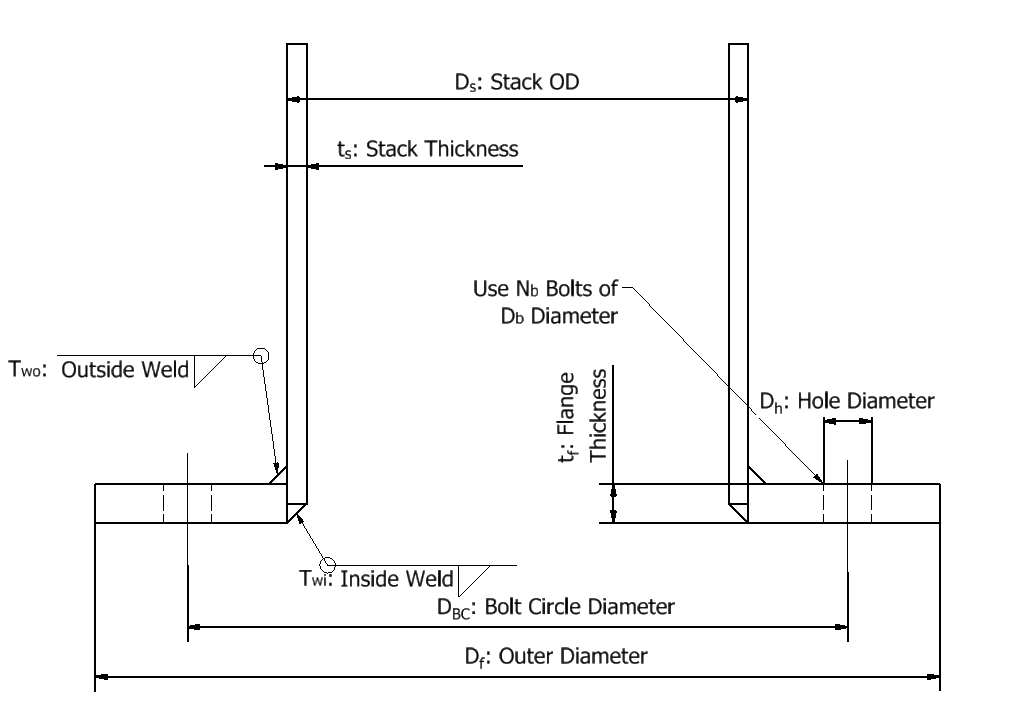
In the course of explaining each design check that is performed, we will use an actual flange design as an example to illustrate the checks. The design data will be as follows:
Bolt Spacing
Plate flanges can have a tendency to warp when welding and this can make it more difficult to seal the flanged connection. The ASME STS-1-2021 Steel Stack Standard indicates in Paragraph 4.6.2(b) requires that bolt spacing be no more than 6 inches for this very reason. Having bolts closer together will allow the plates to be compressed and better seal the connection. Our experience is the 6 inch spacing is a good rule of thumb and should be followed whenever possible. If ASME STS-1 is selected in MecaStack then this will be checked as long as the option is not checked that overrides this check.

Using our data we check our spacing and find that we are meeting the ASME STS-1 requirement of 6 inch [152. mm] because our spacing is actually 151.68 mm.

Bolt Load
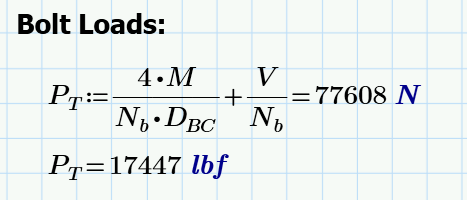
The stack has loads applied on it, and these loads must be transferred through this structural flange connection. We resolve the overall stack loads into the load that is tributary to each individual bolt. The bolt tensile load is calculated below. In our example the V was negative, meaning that is acting downward and so it helps to reduce the overall tension load on each bolt.
Bolt Areas
The nominal bolt area, which is based upon the nominal diameter of the bolt will be calculated. Some of our subsequent calculats are also based upon the root area and so we will calculate that as well. The root area is determined based upon “Mechanical Engineering Design” 4th edition by Shigley and Mitchell.

Bolt Shear
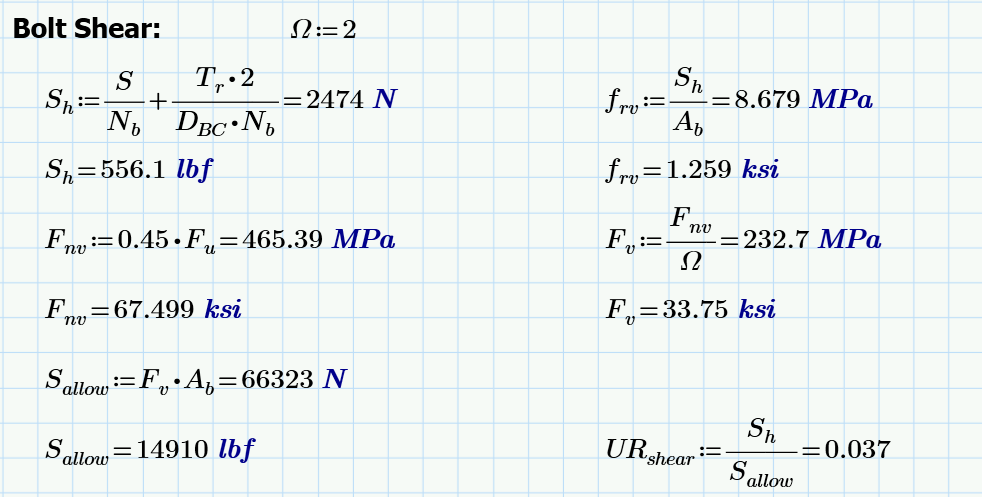
The shear on each bolt is calculated and checked using AISC 360-22 Section J3.6. The shear doesn’t typically control a structural flange, but we do need to determine the shear stress so that the available tension capacity can be calculated and reduced as required by AISC. We ignore any shear resistance offered by friction between the flanges to be conservative.
Bolt Tension
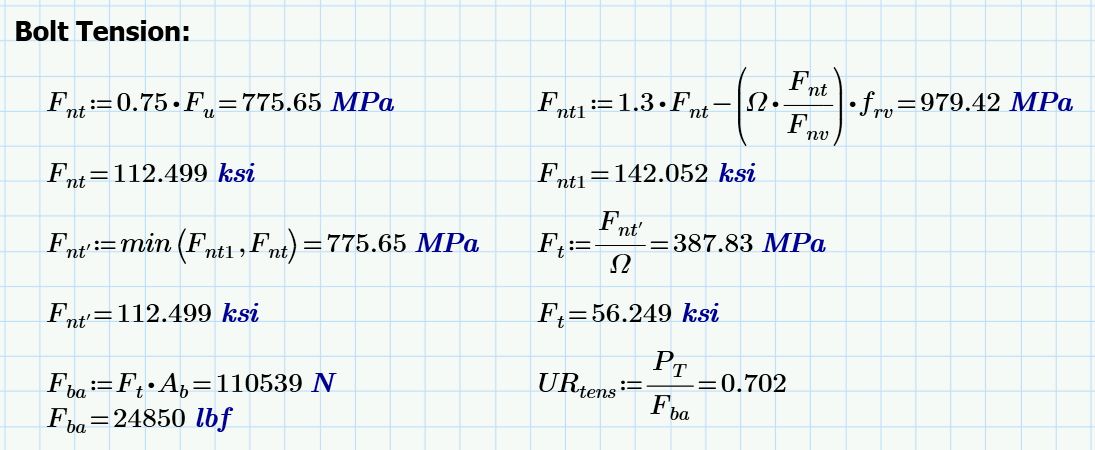
The bolt tension is also calculated per AISC 360-22 Section J3.6. In this example the shear stress was low and it didn’t really didn’t have any effect upon the tensile capacity of the bolts.
Welding Stress
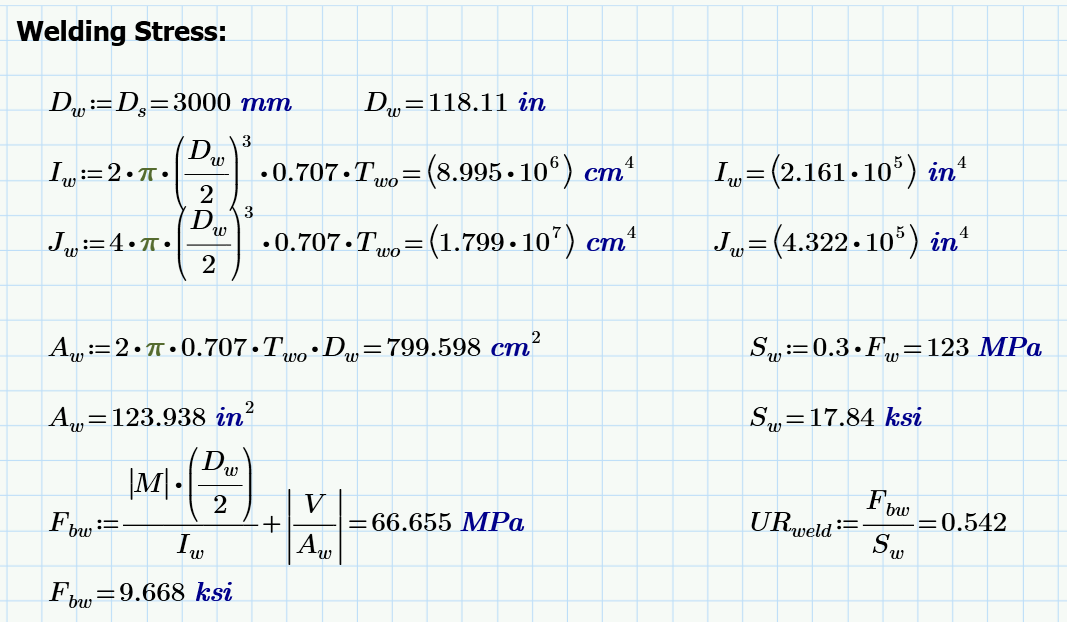
The structural flange has a weld on the inside (Twi) and outside (Two) of the flange, and this transfers the loads into the flange. We conservatively take credit for only the outer weld transferring the loads into the flange.
Bolt Pre-Load
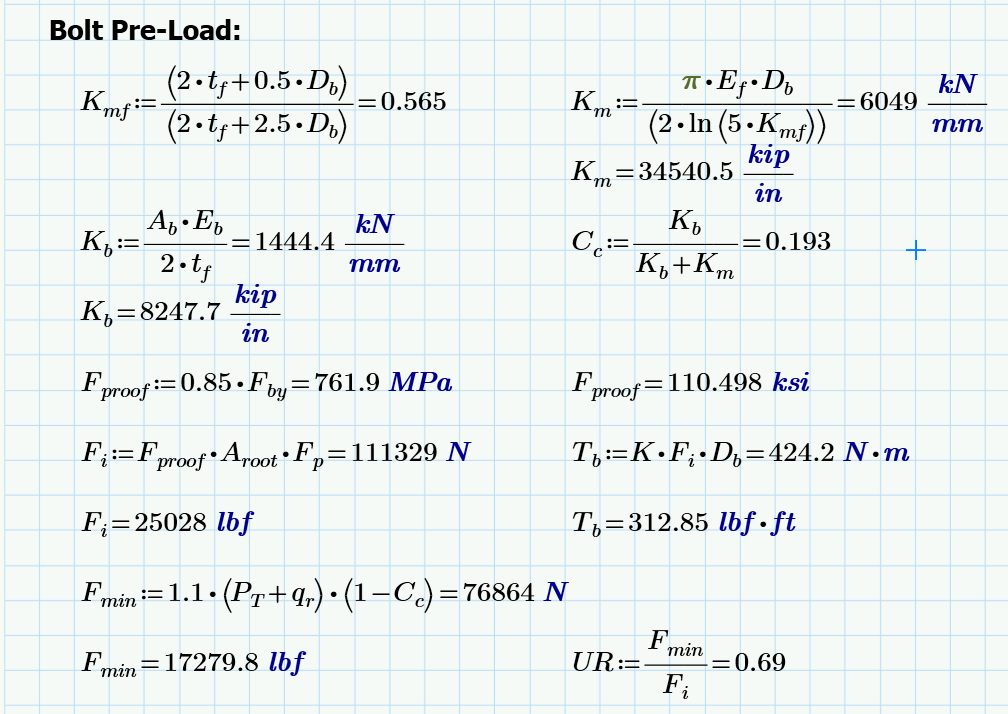
Bolt pre-load is desireable for a couple of reasons. The pre-load keeps the joint in compression, and this is desirable to keep the flange from leaking due to separation of the flange faces. The bolts also have improved fatigue life if they are pre-loaded, because cyclical loading decreases the stress range that the bolt experiences. This topic is discussed in more depth in the reference “Mechanical Engineering Design” by Shigley We generally strive to achieve a pretension in the bolt of about 75% of the proof. In order to estimate the torque required to produce that pretension we need to estimate the coefficient of friction for the threads, which is typically about 0.2. More values are available in the Shigley reference provided.
Flange Thickness
Now we need to determine the thickness of the flange. As mentioned previously to do this we ignore any seating of the gasket because we have assumed that we are either using a self-energizing gasket or some type of sealant that does not require seating. If you are using a gasket that requires seating, then this type of flange is unacceptable and you should refer to the pressure vessel code (ASME Sec. VIII, Div. 1, Appendix 2) or some comparable standard that considers gasket seating.
We determine the flange thickness by using a yield line analysis. To do this we rely upon the paper “A Yield Line Component Method for Bolted Flange Connections” by Bo Dowswell. This is a very useful paper that is written to address different prying type analysis that is encountered in structural applications.
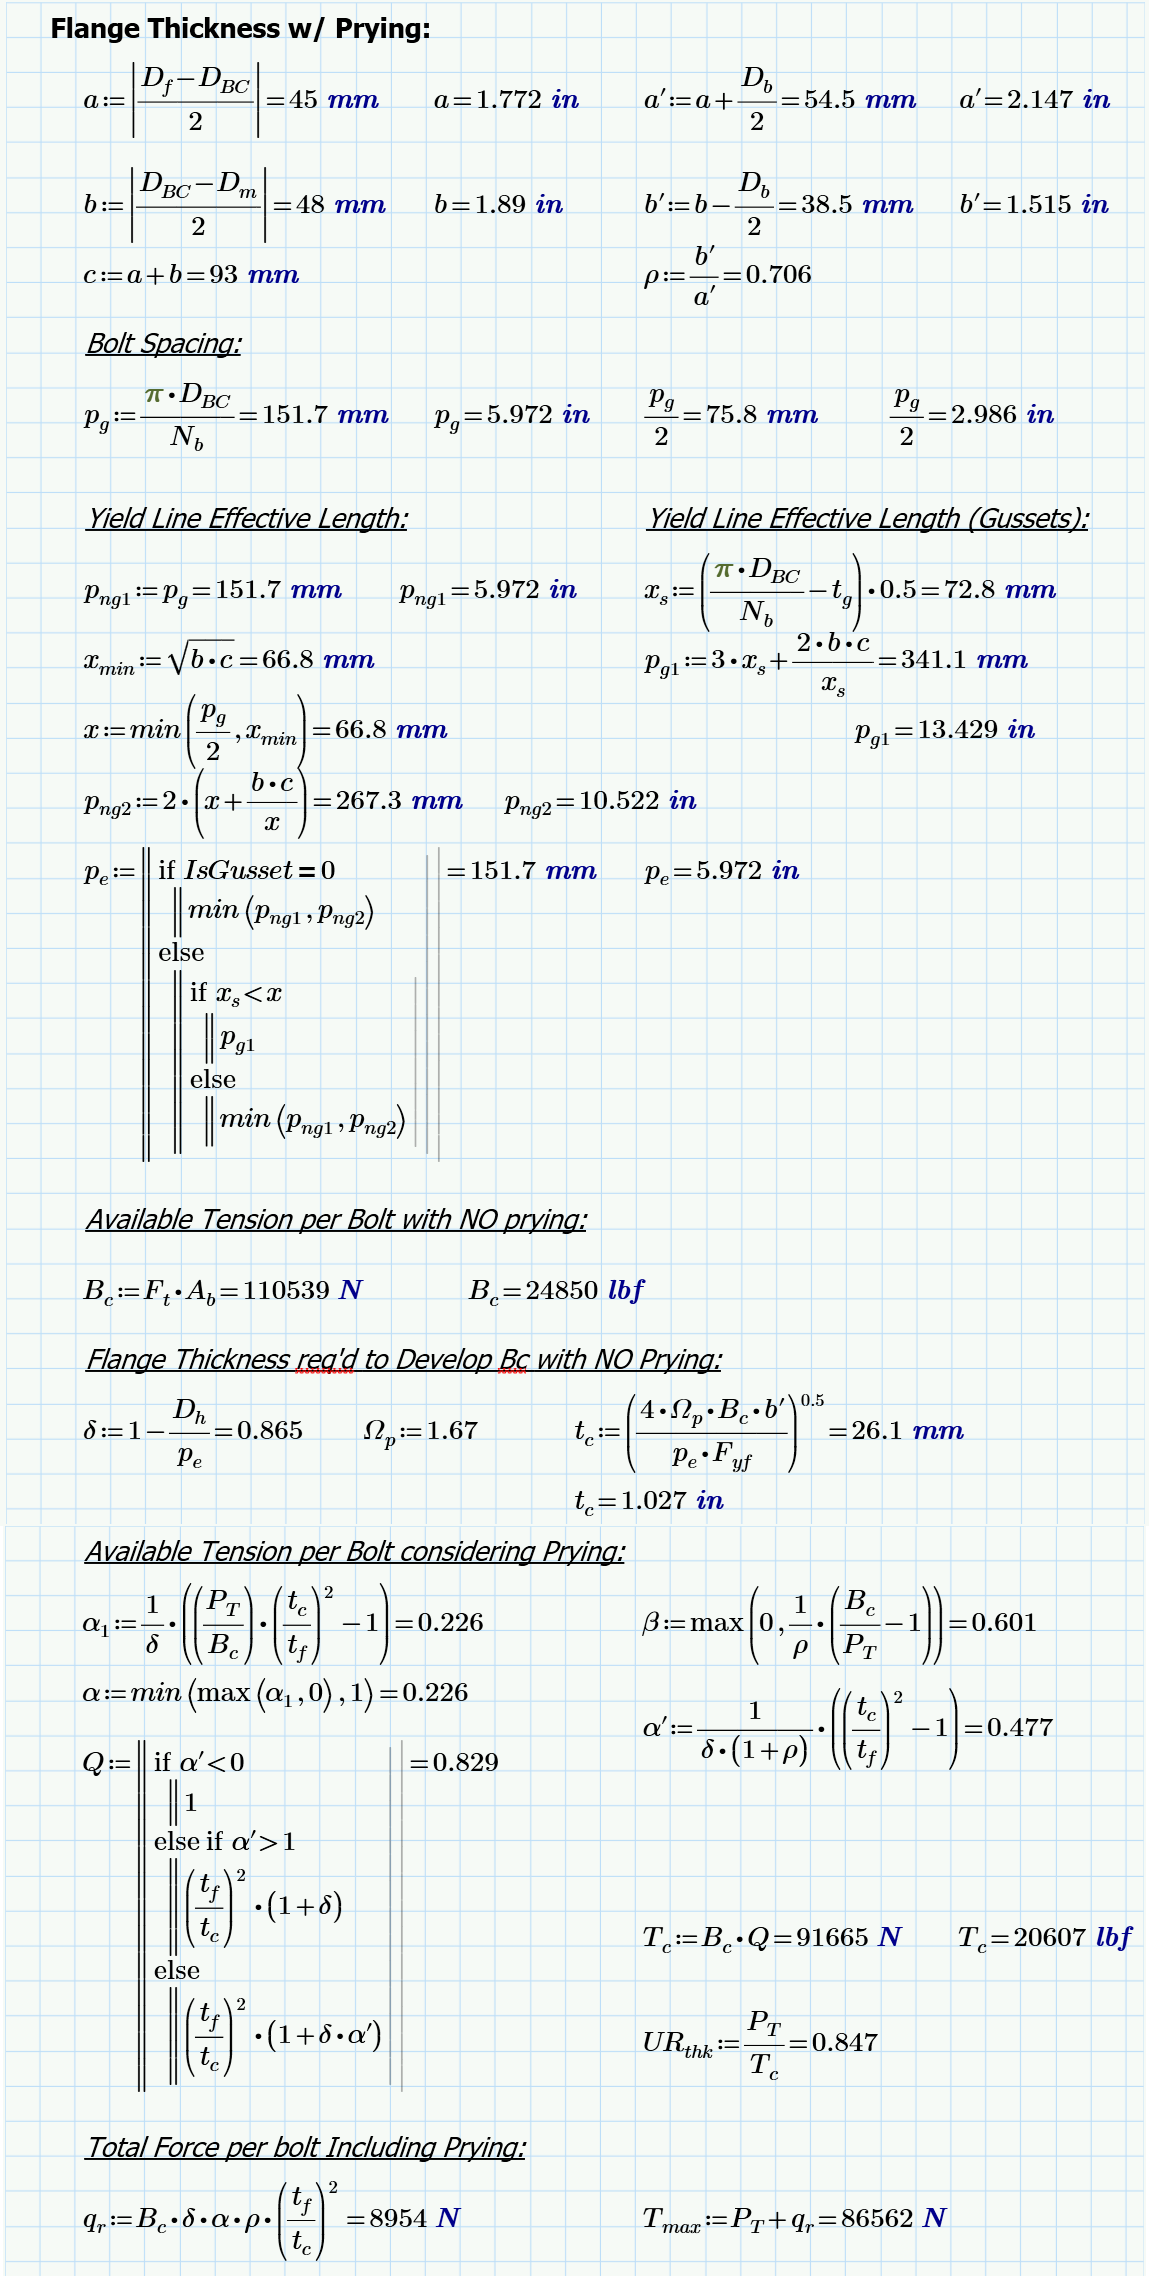
In the “Proposed Design Method” section of Dowswell it is recommended that in the AISC formula for tc that we use the yield strength rather than the ultimate, and so we have applied this recommendation. We follow the prying method from AISC 360-22 Section 9, but we replace p with pe. We determine the yield line patterns that are to be considered, and for a bolted flange without gussets we conclude that the two yield line patterns to the right must be considered. Most likely the yield line pattern for png1 (Top image) will control the design, but we will check png2 also and take the lessor of the two in order to be conservative.


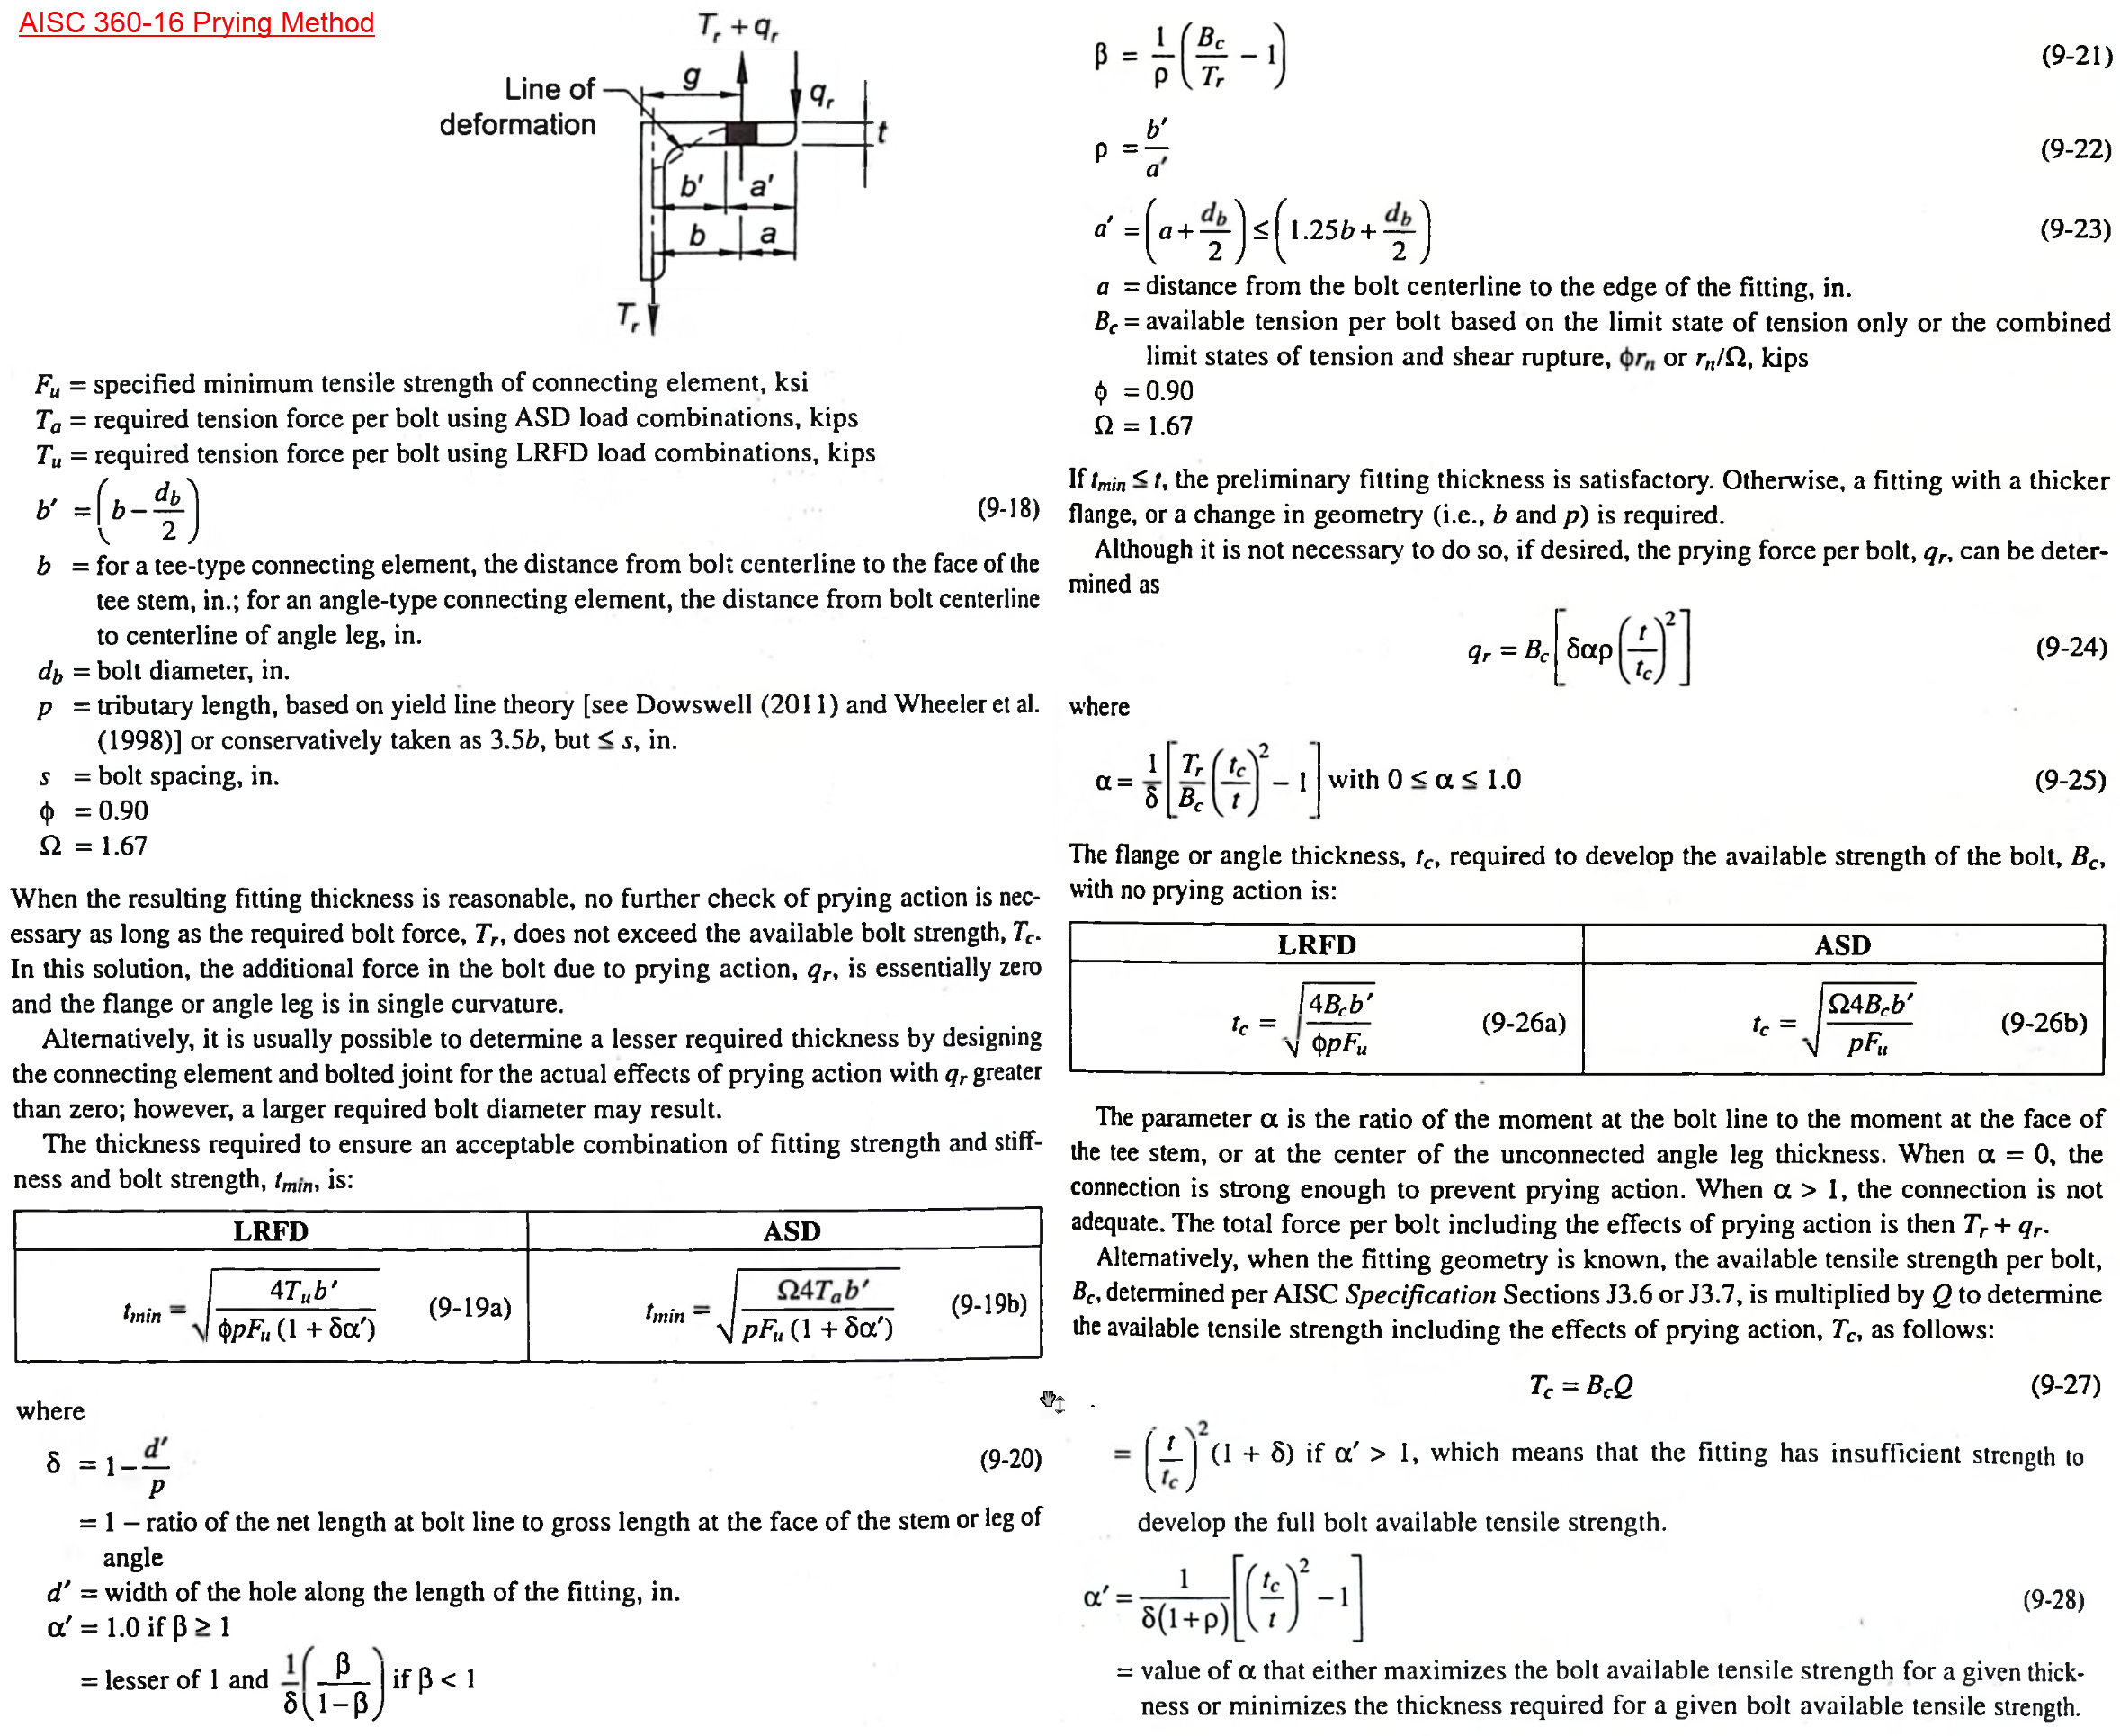
Using the AISC prying method and using pe calculated per the Dowswell paper, we obtain the following calculations to determine that our flange thickness of 20 mm [0.787 inch] is barely adequate. If we would like more safety margin then we can either increase the flange thickness or add gussets to the flange. We have another article which continues this example by adding gussets to the flange and performing the analysis.
Forged Flanges
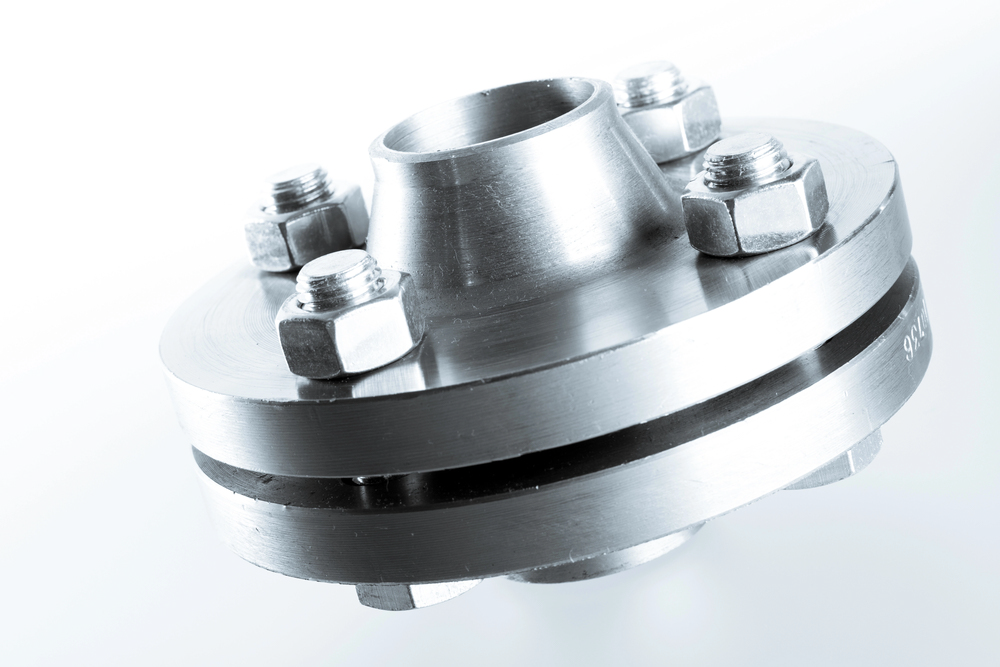
It is not uncommon to use a purchase forged flange for the stack splice, especially when the diameter of the stack is small and conincides with a pipe diameter. These flange typically use a gasket that is necessary for sealling the joint, and as mentioned previously this structural flange design basis is not adequate for checking such a flange. When modeling a forged flange within MecaStack you would ignore any hub (since it is not considered in this analysis) and just enter the flange thickness. The application is only going to check the flange as if it were a structural flange, and for any gasket considerations you should refer to the governing pressure vessel standard which you are following for further guidance.
MecaStack Structural Flange Analysis
All of the calculations we just performed are performed directly within MecaStack. You can see the output of the flange calcualtions at this link, and if you have a licensed copy of MecaStack then you can open the input file at this link.
